
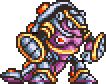
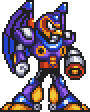
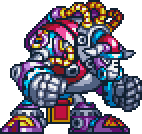
Attack: Shotgun Ice
Special: Ice Breath
Dash Move: Sliding
Ceiling Special: Blizzard
Chill Penguin provides decent all-around capabilities. His Shotgun Ice can be aimed downwards with DOWN and can block projectiles. His Ice Breath can freeze foes and creates two penguin statues. You can only have two penguins at a time, though you can taunt or slide into them to break your penguin statues. The penguins created can block shots, deals contact damage to enemies, and you can even shove them into foes with the ceiling special, Blizzard (press SPECIAL when near a ceiling in a jump to activate). Blizzard also blows enemies in the direction Chill Penguin is facing. Sliding can quickly move Chill Penguin across the map and he can also jump when using it, and brake with LEFT/RIGHT.

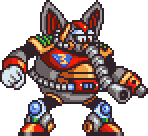
Attack: Punch
Special: Electric Spark
Dash Move: Dash Punch
Ceiling Special: Ceiling Climb
Spark Mandrill is all about power. All his moves are highly damaging, though they are slow with high cooldowns. He can also jump on foes to damage them. Spark Mandrill has a special ability, Ceiling Climb, that can be activated by pressing UP when near a ceiling. On certain maps, the extra mobility this provides can be useful.
Attack: Head Beams
Special: Guarding
Dash Move: Rolling Shield
Armored Armadillo excels at defense. His guard can block all damage, and projectiles that deal 3 damage or more can be absorbed and released in a high damage energy blast that returns double the damage back. Rolling Shield is great for both mobility and damaging crowds; when colliding with a wall, hold JUMP to bounce upwards. Armored Armadillo has double defense when hit from behind (much like Vile's back shield) so long as he is wearing his armor. However, if hit with Electric Spark, his weakness, Armored Armadillo loses his armor and guard move, making him less useful defensively.
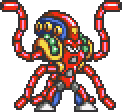
Attack: Missiles
Special: Homing Torpedo
Dash Move: Energy Drain (air)
Launch Octopus packs powerful ranged artillery. His basic missiles can be shot twice in rapid succession to fire two salvos. His Homing Torpedo can cause a full flinch, but has a high cooldown. Both the missiles and the torpedos can damage cracked walls and Frost Shield traps. The whirlpool/energy drain move can only be used in the air above a certain height but is useful for regaining lost health, though it can be mashed out of. Launch Octopus excels on water maps, where he can swim (like Frog Armor) by holding JUMP.
Attack: Boomerang Cutter
Special: Dead Lift
Dash Move: Teleport
Boomer Kuwanger is a blindingly fast Maverick that uses his speed to confuse and disorient enemies. His Boomerang Cutter is fast and deals high damage but can't be used again until it flies back to him. It can be aimed with the arrow keys. Dead Lift is a command grab that can launch foes to the ceiling, but Boomer Kuwanger needs his boomerang on his head to use it. Teleport allows Boomer Kuwanger to phase out of existance for a short time and evade all attacks. You can control the direction Boomer Kuwanger teleports, and by how much, by holding LEFT/RIGHT for the appropriate length. You can even teleport through thin walls (such as those in Powerplant).
Attack: Iron Tongue
Special: Chameleon Sting
Dash Move: Cloak/Decloak
Ceiling Special: Spike Drop
Sting Chameleon is the only Maverick that can climb ladders, making him good on ladder-heavy maps. Not only that but he can even climb any wall in the background by pressing UP, allowing him to reach high foes and map spots easily (press JUMP to go back down). His ability to cloak at any time allows for stealth tactics, though it can only be used four times per life. Iron Tongue can be aimed upwards or downwards and can be used on the ground or while climbing. Activate his ceiling ability by pressing SPECIAL when near a ceiling, to grapple onto the ceiling and shake it, rain a large amount of spikes on the battlefield.
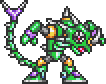
Attack: Storm Tornado
Special: Egg Bomb
Dash Move: Diving (air), Gust (ground)
Storm Eagle excels at aerial combat. Use the UP key to rise and fly into the air. Both Storm Tornado and Egg Bomb can be used on the ground or in the air. Pressing DASH in the air takes Storm Eagle into a dive that can deal good damage to foes, and can also be used to cover distance more quickly; press UP when diving to rise back upwards to avoid landing. On the ground, hold DASH to blow a gust of wind that can push foes back.
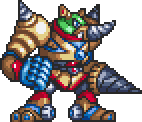
Attack: Fire Wave
Special: Oiling
Dash Move: Jump Press (air)
Flame Mammoth is a behemoth capable of powerful Jump Press stomps that can even knock enemies off their feet from the shockwave. When combined with Oiling, his fire moves are great at area denial; splash some oil in an area on the map, and then shoot Fire Wave shots onto them to make them explode in a large oil fire that lasts for 8 seconds and deals heavy damage and burn time to anyone unfortunate enough to make contact with the flames. Oiling can also be applied to enemies, making them more vulnerable to fire moves.

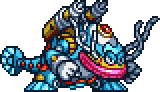
Attack: Fire Breath
Special: Ice Breath
Dash Move: Pounce
Velguarder, Sigma's faithful pet, is one of the few Mavericks that can climb walls. This gives him extra mobility in maps such as Airport and Power Control. His Pounce is great not only directly against enemies, but as a fast dash that can allow you to quickly cover lots of ground. Pounce can also be used from a wall. However, be careful as Pounce can cause you to accidentally fall to your death, as you can't change direction when it's used. His ice breath can be aimed further with the ARROW keys and you can turn around when using it. As you'd expect, the Fire and Ice breath will burn and freeze, respectively.
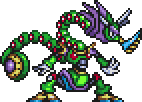
Attack: Strike Chain
Special: Seeding
Dash Move: Lightning
Wire Sponge is an unusually complex Maverick with many options. On the surface, he appears to be an excellent grappler. His Strike Chain goes further the longer you hold down ATTACK before releasing, and can pull you towards walls or yank in enemies from afar. Once a foe is within your clutches, you can then charge up another Strike Chain to damage them with the wind-up when they are within melee range. The chain's windup can also block projectiles, making it a versatile tool. Strike Chain can also be aimed upwards with ATTACK + UP which lets you grapple onto ceilings. He can also cling onto side walls with LEFT/RIGHT, and jump off them; use this ability to prevent falling into pits when grappling.
Seeding will plant robotic seeds which sprout into vines upon contact with the ground, wall or ceiling. These act as mines and are effective when combined with Strike Chain; yank an enemy into your vines for maximum damage. Seeds can be planted both on the ground and when hanging on the ceiling; you can control the seed's direction with ARROW KEY and the launch power by how long SPECIAL is held.
Lighting is Wire Sponge's wild card. You need to hold it for 4 seconds to fully charge up, and are vulnerable while doing so, but if successful will summon a vicious thunderstorm dealing massive damage to all on-screen targets.
Attack: Biting/Eating/Spitting
Special: Spin Wheel
Dash Move: Drill Charge
Wheel Gator is a slow but fearsome Maverick with powerful attacks designed to cause as much flinching and pain to enemies as possible. His bite deals heavy damage but comes out slow with a short range. Wheel Gator can also bite upwards by pressing UP + ATTACK, which will lock enemies in his jaws, forcing them to mash to escape. Spin Wheel launches two bouncing wheels that slice through enemies, causing them to flinch in pain. Drill Charge provides even more flinch in a very rapid multi-hit attack.

Attack: Bubble Splash
Special: Bubble Shield / Summon Crablings
Dash Move: Claws
The second Maverick of Sigma's forces to be specialized for aquatic combat, Bubble Crab excels in underwater maps. Bubble Splash deals low damage but if you hold down ATTACK you'll shoot many rings of bubbles in rapid succession. Press SPECIAL to activate Bubble Shield, which protects Bubble Crab from projectiles with an 8 hit point shield. It also allows him to float indefinitely when underwater (hold down JUMP) giving him great mobility in that environment. Even when on land, you'll jump higher if you press JUMP when landing, bouncing off the ground at a great height. While the bubble shield is up, press SPECIAL again to launch robotic crablings that can damage enemies for you. His claws can be used both on the ground and when jumping, and deal heavy damage, but will immediately pop his bubble shield if it is active.
Attack: Fireballs
Special: Grab/Uppercut
Dash Move: Speed Burner
Flame Stag is a fast, fiery threat with plenty of burn options. His fireballs can be launched twice in succession and travel along walls upon contact. His Speed Burner can be charged - the longer you hold DASH, the farther you'll go when released. If you grab an enemy, you'll take them to the skies before crashing back down; do this under a ceiling for extra damage when smashing them to the ceiling. You can also grab enemies out of a Speed Burner dash by pressing SPECIAL when it is in progress.
Attack: Silk Shot (Cocoon) / Energy Beam (Moth)
Special: Ceiling Thread (Cocoon) / Scrap Absorb (Cocoon, Hanging) / Powder (Moth, Flight)
Dash Move: Spinning (Cocoon) / Sweep (Moth, Flight)
Morph Moth is actually two Mavericks in one, with two distinct phases: the Cocoon phase and the Moth phase. Both are effective healers for not just teammates, but Sigma himself in, particuarly Summoner and Pupeeteer modes.
The cocoon form is the starting form. Its main attack is Silk Shot which launches hunks of junk metal upwards, damaging enemies and healing allies alike, but this runs on limited ammo that slowly recharges. Holding DASH causes the cocoon to spin, dealing damage to enemies on contact. Note that while firing Silk Shot also spins the cocoon, you can hold DASH to spin independently of firing Silk Shot, conserving ammo. Press SPECIAL to launch a thread that can latch onto ceilings, where you can swing from side to side to toss junk all over the place. When hanging from the ceiling, the cocoon gets an additional move, the ability to absorb scrap metal by holding SPECIAL, allowing you to grow in size. Upon reaching a certain size or if reduced to less than 50% HP, you'll automatically transform into Morph Moth's true Moth form (whichever comes first).
Morph Moth's moth form can fly, like Storm Eagle, but also like the eagle, the moth's flight abilities are limited by a slowly draining flight meter. Morph Moth can shoot energy beams both on the ground and in the air with ATTACK, and this can be aimed. Morph Moth can also sweep quickly in the air if holding DASH while flying. Pressing ATTACK or SPECIAL while sweeping, you can drop powder that stuns enemies and heals allies, but this move drains your flight meter faster. After stunning an enemy with the powder, see if you can quickly follow up with an energy beam before they mash out.
Attack: Shuriken (Press) / Magnet Mine (Hold)
Special: Magnet Pull
Dash Move: Teleport
Magna Centipede is a swift and cunning ninja. His primary attack fires Shurikens in a cone pattern, great for enemies up close or just filling a battlefield with projectiles. Hold ATTACK to enter a telekinesis mode where Magna Centipede turns his tail segments into his signature Magnet Mine attack; control the circling mines with ARROW keys. SPECIAL will pull enemies towards Magna Centipede's tail, draining their health on contact. After pressing DASH to teleport, use ARROW keys to control where you will re-appear. By pressing UP and DOWN you can even teleport to the ceiling, upside down. When on the ceiling you can use all your moves as normal and gravity is reversed, effectively turning the map upside down for Magna Centipede. Use this to sneak to the objective unnoticed. You can return to the ground (or go back to the ceiling) by pressing SPECIAL in the air.

Attack: Crystal Hunter (Out of shell) / Shell Slam (Inside shell)
Special: Time Slow (Inside shell)
Dash Move: Withdraw
Despite having the slowest base speed in the game, Crystal Snail provides excellent defense and crippling slowdown and ensnaring status effects. His Crystal Hunter fires three globs that can freeze enemies in their tracks. This is the only move he can use outside of his shell. Press DASH to withdraw into your shell. This provides invulnerability to all attacks but you can only hide in your shell for so long. While in the shell you have two additional moves at your disposal. You can press and hold ATTACK to charge up a tackle move and release with good timing to fly in the desired direction. This not only causes great damage (and more to crystalized enemies) but negates Crystal Snail's poor speed. Hold SPECIAL inside the shell to charge up Crystal Snail's slowdown move. Release to unleash a charged Crystal Hunter that unlike with X, will follow Crystal Snail's position. Be careful of Magnet Mine - this will knock you out of your shell! Without his shell, Crystal Snail is marginally faster and even gets a dash move that can damage crystalized enemies, but loses most of his shell-based utility, so use that extra speed to get back in your shell.
Attack: Sonic Slicer (horizontal)
Special: Sonic Slicer (vertical)
Dash Move: Jump Kick
In stark contrast to Crystal Snail, Overdrive Ostrich is the fastest Maverick in the game. At top speed he will trample and damage anything he runs into. However, he must accelerate before reaching full speed, and when sprinting, he lacks agility: he will skid and brake if you try to turn directions or run into a wall. Jumping before turning helps alleviate this flaw. Aside from his outstanding maximum speed, Overdrive Ostrich is pretty basic. As a projectile, he has two forms of Sonic Slicer. The upward one covers a wide area but can be dodged in the space between the falling slicers, while the horizontal one has a higher rate of fire. Jump Kick can damage enemies without having to reach full speed.

Attack: Z-Buster Level 2 (Idle), Z-Saber (Dashing)
Special: Z-Buster Level 3
Dash Move: Ground Punch
Neo Sigma's fake replica of Zero deviates from the real one in that it focuses primarily on powerful buster weaponry from range at the cost of clunky, awkward mobility. ATTACK shoots level two Z-Buster shots at a high rate of fire. SPECIAL performs a 3-part combo: two level 3 Z-Buster shots followed by a sword beam. This combo is highly damaging but uses heavy amounts of buster energy. Finally, DASH has Fake Zero punch the ground, firing fragments in an upward pattern, but unlike the similar Rakuhouha, this doesn't provide invulnerability frames. While dashing, Fake Zero can also hold ATTACK to pull out his sword and damage enemies in the way.
Attack: Frost Shield
Special: Freeze Beam
Dash Move: Charge
Blizzard Buffalo is a very large, heavy and slow Maverick, but makes up for it with good defense and freeze/crowd control options. His Frost Shield can be aimed in different trajectories with ARROW keys and goes further the longer you hold ATTACK. Place the projectiles strategically to block attacks. Freeze Beam deals no damage but immediately freezes enemies in their tracks, and can the beam be stopped by pressing SPECIAL again. Charge will actually drag enemies into walls, damaging them in the crash. Try dragging foes into your own landed Frost Shields as well.
Attack: Acid Burst
Special: Acid Burst (x2)
Dash Move: Liquefy
Toxic Seahorse is all about applying debilitating status to foes. His Acid Burst works like X's, dealing no initial damage but rather 1 damage over time with a drop in defense, so follow up with attacks from Sigma or another Maverick after you've acidified enemies for the best results. Liquefy allows you to evade enemy attacks and even damage enemies upon re-materializing, but it drains your energy bar so use sparingly.
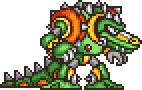
Attack: Tornado Fang (x3, forward)
Special: Tornado Fang (x3, forward + diagonal)
Dash Move: Charge
Like Blizzard Buffalo, Tunnel Rhino is a heavy, lumbering Maverick, slow but with powerful attacks. Tornado Fang slows enemies down as it drills into them. Press ATTACK twice in rapid succession to launch two more drills. Unlike Blizzard Buffalo, his Charge doesn't drag enemies into walls but simply deals damage on the spot.
Attack: Thunder Ball
Special: Triad Thunder
Dash Move: Thunder Bolt/Electrify
Volt Catfish is unusually complex for an X3 Maverick (which mostly tend to be straightforward). His main attack is simple, launching a single electric ball that crawls along surfaces. Triad Thunder is more involved, with context sensitive SPECIAL button behavior; at first it shoots 3 electric mines. These can then be electrified with 3 more electric mines by pressing SPECIAL again, which can then finally be sucked into Volt Catfish's mouth by holding SPECIAL, which charges up his energy for his Dash move. At less than full energy, he will shoot two thunder bolts upward with DASH, good for enemies above you, and at full energy he'll enter an electrified state, scattering electric sparks about and dealing contact damage with two barriers on his sides to boot. This move lasts until you run out of energy or let go of SPECIAL.
Attack: Claw Shot
Special: Snare Shot
Dash Move: Snipping
Crush Crawfish can deal massive damage with his snipping claws if you can command-grab enemies with his dash move. His Claw Shot can be aimed, and his SPECIAL button projectile can slow enemies down, making them easier to grab.

Attack: Claw Swipe
Special: Ray Splasher
Dash Move: Dash
Neon Tiger is a fast melee beast with quick claw swings, and the ability to cling to walls. His Ray Splasher is a decent projectile but has a gaping minimum range, so use it from afar. It can also be used and aimed when clinging onto a wall. His claw swipes can flinch on the second swing; alternatively, hold down ATTACK to unleash a flurry of weaker swipes. This Maverick has a lot of flexibility in his attacks, and can claw enemies in the air and on the wall as well as on the ground. Neon Tiger can also dash on the ground for a speed boost and dash attack. He can pounce like a real tiger by pressing JUMP during a dash or by pressing DASH when clinging to a wall, which can be followed by a claw swipe for hunting down prey.
Attack: Energy Ball
Special: Gravity Well
Dash Move: Horn Lift
Gravity Beetle is a slow, heavy Maverick who brings gravity manipulation to the fight. His Gravity Well sends a player-sucking projectile above him, and can be charged for a larger and stronger effect. His energy balls bounce off walls and can be aimed sideways or upwards. He can also throw enemies upwards with his horn by dashing into them; try lifting enemies into your own Gravity Wells for a strong combo.
Attack: Parasitic Bomb
Special: Lock-on / Homing Bees
Dash Move: Stinger
Blast Hornet is a mobile, agile aerial threat. He is the third of the flying Mavericks and focuses on hit-and-run offensive strikes. His Parasitic Bomb shoots 5 bees that can latch onto enemies, dealing damage over time until destroyed. Press SPECIAL to shoot an aimable cursor that if it hits an enemy, will target them for further SPECIAL attacks which will launch homing bees on the target. These bees deal more damage and flinch than the regular ones. Press DASH in the air to sting enemies below you; the stinger hurts a lot, but has a long and predictable startup time and forces you into melee range.
Attack: Neurocomputer Shock-Gun / Vaccine
Special: Absorb
Dash Move: Flame Charge
Dr. Doppler brings his scientific genius to the battlefield, supporting Sigma and allies with his groundbreaking Neurocomputer Vaccine. You can swap between the main shock gun and vaccine by pressing UP/DOWN. The shock gun is a basic electric mini-flinching projectile and Doppler's primary form of attack. The vaccine deals no damage and is to be used on allies. It does not heal them, but instead cures all status effects and protects against additional status for a few seconds. The "vaccinated" status effect runs out over time, so you will need to keep hitting allies with the vaccine to apply additional stacks of vaccine time per hit. Absorb is another scientific marvel that lets Doppler convert enemy projectiles into healing for himself. The more damage, the more healing, though not all projectiles can be absorbed, mainly energy-based ones. While powerful, this move runs on a limited meter. Finally, press DASH to charge at enemies with a fiery tackle, dealing good melee and burn damage. Dr Doppler, being a human-based Maverick, can climb walls and ladders.